|
|
Post by Larry Madsen on Dec 16, 2020 10:37:07 GMT -5
Well, I promised some PICs, so here we go. I found one repair to the bearing edge (of the bass) I had not first noticed. That long stretch of white wood from the center going to the right was a 2.5" long area where even the second layer was damaged and the bearing edge was pretty much gone. I shaved it down flat and laminated a new piece of wood to replace it then reshaped the bearing edge. It turned out fine and I'm sure it will hold. The more triangular repair there was simply the mahogany skin broken away.  DSC_2423 - Copy DSC_2423 - Copy by Larry Madsen, on Flickr This one was just the mahogany skin broken away as well ... no huge deal. All of these repairs are on the resonant side.  DSC_2424 - Copy DSC_2424 - Copy by Larry Madsen, on Flickr These are a couple of the holes in the snare shell I filled. The one to the left is the extra hole from the DW strainer mounting done by the prior owner. this hole was hogged out on the inside, so while the hole only needed to be about 3/16" (for his purpose) I had to drill it out to about 7/16" to plug it. The one to the right of that is one of the "extra" holes I chose to eliminate.  DSC_2425 - Copy DSC_2425 - Copy by Larry Madsen, on Flickr This is the four shells all sanded and oiled. I'll probably use some steel wool on the interiors today and add another coat of oil, maybe a third coat tomorrow.  DSC_2426 - Copy DSC_2426 - Copy by Larry Madsen, on Flickr This should have the shells ready to go. I did make one other correction to the 13" tom shell. It was laid out to mount off the bass and to the right. Me not being a drummer, I did not make that out as a problem that at first. After doing some looking it occurred to me that all the single (bass mounted) tom kits have that single tom on the left directly behind the snare. I had already drilled the holes to accept the set-o-matic tom mount and pretty much centered them vertically on the tom, so I just flipped the tom over. This switches the badge hole to the front (when mounted to the left) and the damper toward the drummer (now on the resonant head). With that I had to fill the previous damper holes and re-drill new ones at the (new) top of the drum. Might sound like a lot, but not really. Probably harder to describe it than to do it.  I should add: I did sell that DW thow-off this morning. I had it listed at $29.00 and a guy offered me $25.00 ... I took it. |
|
|
|
Post by Larry Madsen on Dec 16, 2020 10:44:11 GMT -5
PM me if you'd like 'em cheap (I'd keep one of the pedals). Thanks for the kind offer tiller2. I'll keep that in mind. I have some extra lug screws here as well and I'm not sure what I want to do regarding bass pedal and high-hat stand, etc. |
|
Grizbear-NJ
Wholenote
 "I'll do the BEATING around here"
Posts: 217
Age: 71
|
Post by Grizbear-NJ on Dec 16, 2020 23:45:30 GMT -5
Larry; Your workmanship looks fantastic, and you were right on track regarding the 13" tom being set up for the right side. Most of the drum manufacturers originally (normally) sized their drum (toms) diameters ranging as follows; 6"-8"-10"-12"-13"-14"-15"-16"-18"; the bass drums ran 20"-22"-24"-26"; and snares were normally 14". Depending on what style or genre of music you were playing, the combinations constantly changed.
The standard four piece set (which you are putting together) was originally marketed as a "Jazz Kit" by most manufacturers.(14"snare, 12"tom, 16"fl/tom, and a 22" bass drum.) Later when you had the double toms (5-piece kit) they were 12" & 13"; with a 24"bass.
In theory, the Jazz Kit drum shells were thinner, and the drum heads were of a thinner quality also, to meet the needs of a jazz or "Big Band" drummers. (thinner cymbals also). As Rock & Roll evolved, so did the drumkits. There actually came a point, where all rules and norms were thrown out the window; this is where modifications, upgrades, and alterations became the industry standard.
Also keep in mind there is always a cost factor. The original double bass drummers (a style which I credit to the Brits), involved the drummer acquiring two standard four piece sets and combining them. (As cheaply as possible) Unless you were lucky enough to find identical kits, nothing ever matched; and some of the modifications I saw done, I considered absolutely insane. You now had the birth of customizing drum kits. (Drummers opinion: to match the Marshal stacks on stage!)
I consider myself an amateur drum technician; my experience is knowing which drum parts are compatible and interchangeable. (especially for quick repairs) I am totally impressed with the work you are doing my friend.
|
|
|
|
Post by Larry Madsen on Dec 18, 2020 18:23:49 GMT -5
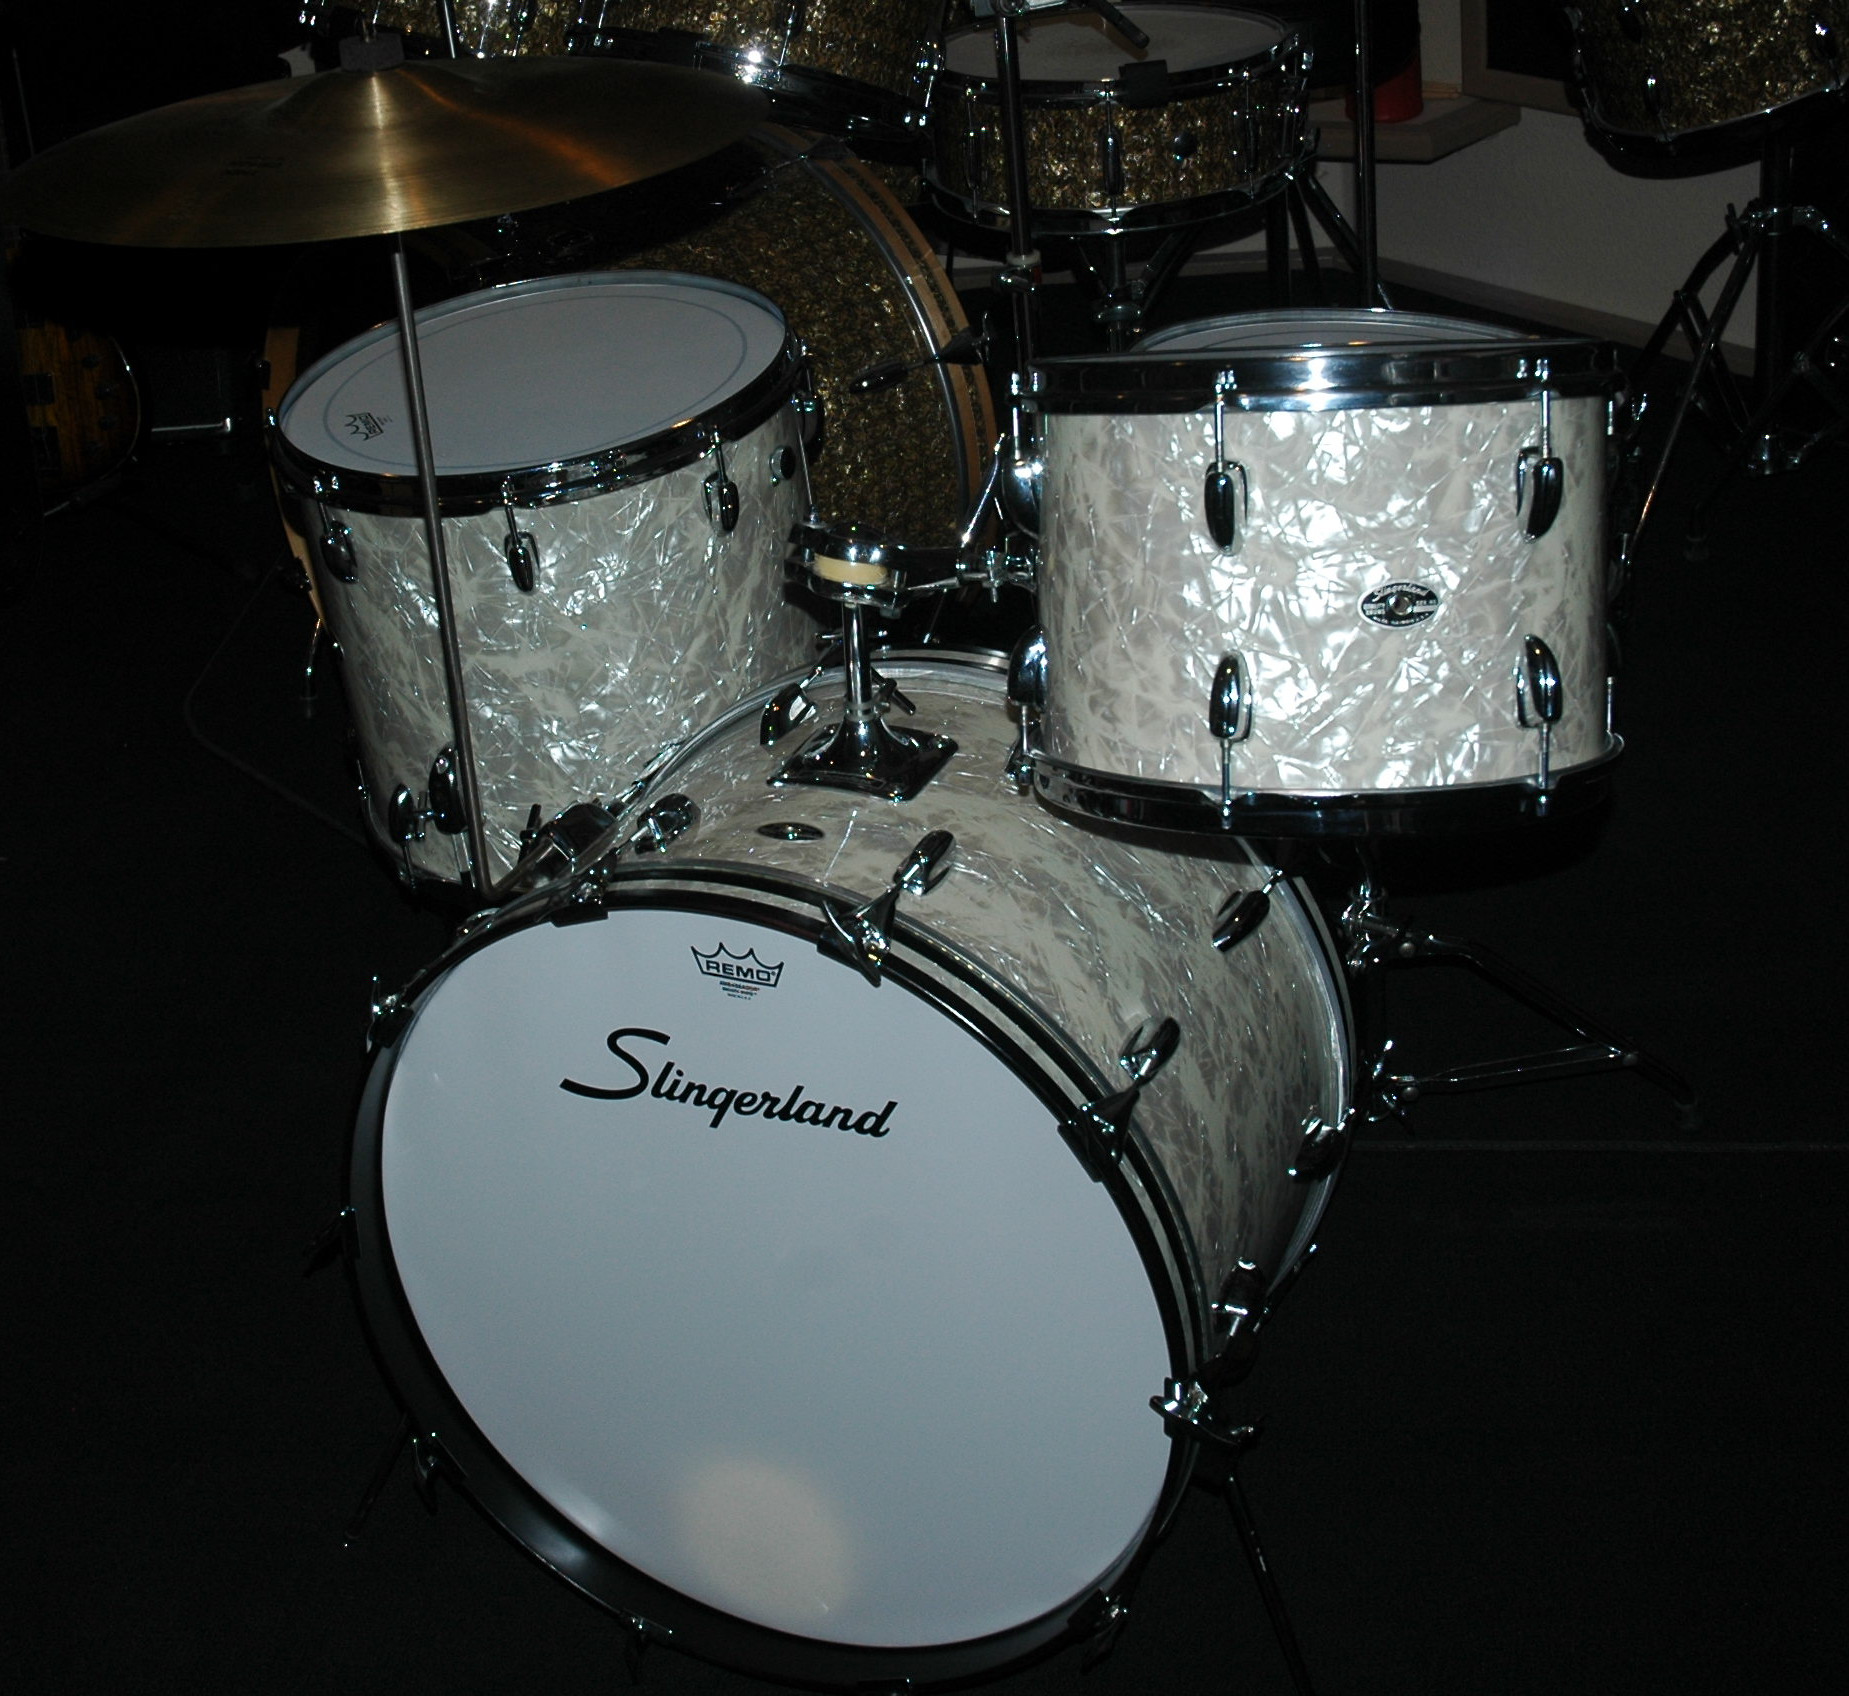
I talked to my guy at Jammin Sam yesterday. I know I indicated here and have been set on the Black Oyster Peral wrap ... However, I have recently had some second thoughts. I am considering the White Pearl like this one  cymbal mount cymbal mount by Larry Madsen, on Flickr In talking to Jammin Sam he had some input about it. He recommended no on the Black Oyster Pearl. Being a drum specialist and Pro his thinking is Slingerland never put that wrap on a set of drums from the era of my shells. OK, I get that. Then he is inclined to think in terms of what would make the drums more valuable on a sale of the finished kit. Ok, I get that too. He thinks the White Pearl is the way to go. I had already sent him an electronic estimate request for White Pearl, so the genesis of the idea of White Pearl was actually mine not his. They also make an "aged" White Pearl. Jammin Sam thinks the best way to go on the kit is Aged White Pearl. I'll admit, I am leaning his way right now. This being "my" kit, I had not thought in terms of what might make it the best investment. I have also never thought in terms of what might be the most economical way to get the project completed. I have simply thought about what it is I want to do ... end of story. The White Pearl is less expensive than the Black Oyster Pearl (by about $80.00). The Aged White Pearl is up closer to the Black Oyster. Obviously, $80.00 up against the total cost of building a drum kit for scratch is nothing. No big deal there. This is a kit (from Jammin Sam's web site) just about like what I am building wrapped in Aged White Pearl  Aged White Pearl Aged White Pearl by Larry Madsen, on Flickr Any thoughts out there regarding my thoughts of changing course on wraps? |
|
Grizbear-NJ
Wholenote
"I'll do the BEATING around here"
Posts: 217
Age: 71
|
Post by Grizbear-NJ on Dec 19, 2020 0:03:29 GMT -5
Your friend was spot on about Slingerland; they never did a "Black Oyster Pearl" wrap. The closest thing in black they used was "Black Sparkle" or "Sparkling Black" (depending on which year you are looking at). My original thought when you mentioned the Black Oyster Pearl, was that it was an original idea, and never done before.
One thing I can confirm, is that any finish involving the color black will highlight more "scratches" & "blemishes" than other finishes. The White Pearl in the photo hides imperfections well.
I always favored "Rogers Drums": my primary kit is Rogers XP-8 drums (Big "R" badge series), the 1970 series. The Rogers finish I have; has an "Ebony Black Gloss" finish on them. When I surf E-Bay for parts, I always look for that color finish regardless of the series or year.
NOTE: The new series of Rogers drums are not the old company. The new company just acquired the name, and re-did the logo; the overall quality is not the same in my opinion.
In regards to your choice of finish; if you don't intend to sell them, use whatever finish makes you happy. If you are going to customize, think outside the box.
|
|
|
|
Post by Larry Madsen on Dec 19, 2020 18:25:48 GMT -5
If you are going to customize, think outside the box. Part of my change of heart on this is me thinking outside of the box I had put myself into. I had been thinking so long about the idea of a Ringo Kit, I realize how that is a bit over-done by so many. I concluded that I had place myself in that particular box. I have told people many times about painting cars. They ask, "What color will you paint it"? My response, "It will depend on what choice I make on the day I buy paint". This might be a little like that. I hate being (or feeling) pinned in. Sometimes I realize I've pinned myself in. Dwight Yoakam has a song, *I've been thinking about leaving long enough to change my mind* |
|
Grizbear-NJ
Wholenote
"I'll do the BEATING around here"
Posts: 217
Age: 71
|
Post by Grizbear-NJ on Dec 19, 2020 22:22:29 GMT -5
I fully understand your point of view; like I said, whatever makes you happy.
|
|
|
|
Post by Larry Madsen on Jan 1, 2021 17:53:36 GMT -5
|
|
Grizbear-NJ
Wholenote
"I'll do the BEATING around here"
Posts: 217
Age: 71
|
Post by Grizbear-NJ on Jan 2, 2021 0:15:57 GMT -5
Good call on the fiber drum cases; it is always good to protect your investment. One note regarding the interior of the cases, it would be wise to have an interior lining to protect the finish on the drum. If you are going to put that much work into the drum finish, it would be a shame to have the case interior put a scratch in them. A lot of the fiber and molded drum cases come "unlined", meaning the the drum could be in contact with a "non-padded" material, allowing rivets or other fasteners (especially by the handles) to make contact with the drum shells. (same problem with both the fiber board or molded plastic) Simple solution; you can line the case yourself by using an old blanket, packing quilt material, "velour", or soft foam sheets. If you go that route, I suggest custom cutting the material to fit, and gluing it to the inside, making it permanent. Use the thinnest material possible, allowing for some space between drum and case.
Also note: fiber cases are "not" waterproof. If the exterior is exposed to moisture, they have a tendency to warp. Solution: wax the exterior of the case for added moisture protection.
I definitely want to see photos of the finished project (cases too) when your done.
|
|
|
|
Post by Larry Madsen on Jan 13, 2021 10:53:16 GMT -5
Two of the final "parts" issues have resolved. I received my second hoop ... which is a replacement for one hoop of a pair I purchased earlier then decided one was not up to standards. Plus I received my drum cases for the kit.   DSC_2457 DSC_2457 by Larry Madsen, on Flickr I'll have some restoration work to do on the hoops, but it's easy stuff. Sand and paint then install new trim strips when I get the wraps. I found this a few months ago in my neighbor's trash after they moved out of the house. I did not know at the time what use I might have for it ... now I do. This roll is 5/8" foam in a 6' wide roll and it's about 90" long. I'm lining drum cases with it.  DSC_2463 DSC_2463 by Larry Madsen, on Flickr This is the end result. Now I just need to hope I have enough foam.  DSC_2464 DSC_2464 by Larry Madsen, on Flickr |
|
Grizbear-NJ
Wholenote
"I'll do the BEATING around here"
Posts: 217
Age: 71
|
Post by Grizbear-NJ on Jan 15, 2021 0:10:59 GMT -5
Larry; that foam is perfect for the case lining.
|
|
Grizbear-NJ
Wholenote
"I'll do the BEATING around here"
Posts: 217
Age: 71
|
Post by Grizbear-NJ on Jan 15, 2021 0:11:54 GMT -5
Larry; that foam is perfect for the case lining.
|
|
|
|
Post by Larry Madsen on Jan 20, 2021 20:06:03 GMT -5
I ordered the wraps today. "Slingo" went by the wayside. I ordered the Aged White Pearl wrap. Sam is cutting and prepping it today, then shipping it out tomorrow. |
|
Grizbear-NJ
Wholenote
"I'll do the BEATING around here"
Posts: 217
Age: 71
|
Post by Grizbear-NJ on Jan 20, 2021 22:54:01 GMT -5
I still want to see the finished product; Good Luck with the work.
|
|
|
|
Post by Larry Madsen on Jan 20, 2021 23:13:48 GMT -5
I still want to see the finished product; Good Luck with the work. Rest assured ... After starting the thread here, the finished kit will be put up for all to see. |
|
|
|
Post by Larry Madsen on Jan 23, 2021 19:31:59 GMT -5
The wraps are here. Maybe I'll get one together tonight before my bed time.  DSC_2481 DSC_2481 by Larry Madsen, on Flickr |
|
|
|
Post by Larry Madsen on Jan 27, 2021 13:08:22 GMT -5
I will be purchasing drum heads for the kit very soon. Looking for some guidance on choices. I have all Remo heads on the big kit and am leaning toward those for this kit as well. I have clear batter heads on the big kit, but would prefer opaque heads on this kit. This is what I am currently looking at: PINSTRIPE® COATED remo.com/products/product/pinstripe-coated/One question is regarding the use of the exact same batter heads on all four drums, any advantage to different heads on specific drums? Looking at these for resonant heads on all but the snare (of course) AMBASSADOR® SMOOTH WHITE™ remo.com/products/product/ambassador-smooth-white/Thoughts? |
|
|
|
Post by Larry Madsen on Jan 27, 2021 16:26:14 GMT -5
Starting to look more like drums. Drilling in the holes through the wraps. I think I'm going to need a new batch of lug screws. A trip to Ace Hardware may be on the agenda.  DSC_2482 DSC_2482 by Larry Madsen, on Flickr The 14 X 16" tom is in clamps. I just got the wrap around it this morning. I leave them clamped for a day just to make sure the tape is secured and tight. |
|
|
|
Post by Larry Madsen on Feb 24, 2021 15:44:41 GMT -5
I have my bass drum mount for a cymbal installed. It's just a common floor tom leg mount, as is common for many Slingerland kits.  DSC_2512 DSC_2512 by Larry Madsen, on Flickr Closer look.  DSC_2513 DSC_2513 by Larry Madsen, on Flickr I decide to make a re-enforcing block to spread the load on the shell inside. It's just a piece of pine cut with a radius to match the drum on the contact side and a couple of fender washers recessed into the wood to spread the load at the screw head. It should work as intended and it's stained and finished to match the interior of the shells.  DSC_2515 DSC_2515 by Larry Madsen, on Flickr I am working on a custom damper to go inside the drum. It's another engineering project. I've found myself rethinking it several times already trying to get it right. |
|
Grizbear-NJ
Wholenote
"I'll do the BEATING around here"
Posts: 217
Age: 71
|
Post by Grizbear-NJ on Feb 24, 2021 23:55:53 GMT -5
Great job on the drums Larry:
Regarding the drum heads; clear or opaque, is just terminology to describe the look of the drum head. After that, it depends on what "sound" you want to develop from the drum kit.
The term "pinstripe" is usually an added piece of drum head material (a ring bonded to the head and close to the rim) designed to reduce overtones; the pinstripes could be internal or external, and of different widths (ranging from 1/8 inch, up to 2 inch wide). You will also come across "black" or "white" dot heads; (same basic principal) the dots are bonded to the head and placed in the center of the drumhead. The diameter of the dot is proportional to the drum diameter. Besides the overtone issue, the dot reinforces the drumhead center from the constant strikes from drum sticks. My experience with some of the "younger" drummers (hard rock) that I have encountered, is they use the dots as a "target" when playing. (I'll reserve commentary for another time.)
You will also come across "hydraulic heads" (it's a misnomer) it is actually a double-ply head which gives the illusion of a fluid between the heads.
The term "coated" means the head surface has a texture (like sand paper); most snares utilize coated heads. To address one of your questions; I am of the school of thought that the snare head should be different than the tom heads for a number of technical reasons. (I won't boar you at this time.)
Here is my analogy. All guitarists choose different brands and gauges of strings, depending on their guitar and what style of music they are doing. Drummers are no different regarding drum heads. Certain combinations just work!
Example: I refurbished a Rogers five piece drum-kit for the sole purpose of playing at "Jams"; knowing full well that different drummers would be using the kit, and we would be doing a variety of different musical styles. I selected the drum heads accordingly. I selected a clear, black dot, pinstripe combo for the batter tom-tom heads, and used hydraulic heads for the bottoms. I utilized the same style clear, black dot, pinstripe for the bass drum batter side, and a single ply (black) ported head for the front. My overall goal was to "studio tune" the drum set; meaning to take All of the overtones out. I utilize a "torque tuner device" to tune all of the heads. (I will keep my snare drum set up a secret.) Indoors or outdoors, the set up works and sounds good.
Regarding the internal damper or muffler: I prefer to not use internal mufflers, and usually remove them. Instead; I utilize "external" mufflers (If needed) Experience with drum mic's taught me some lessons.
|
|
|
|
Post by Larry Madsen on Feb 25, 2021 10:38:26 GMT -5
Thanks for the comments and info. These are the heads I went with, just as I had suggested previously. It required some chasing around to get them all. Most were at Musician's Friend online. The upper right is the Ambassador Smooth (resonant). The other two are the Pinstripe Coated. These do not include and dampening with the ring. The Double Pinstripes on the Big Kit do include a dampening ring.  DSC_2518 - Copy DSC_2518 - Copy by Larry Madsen, on Flickr This is the throw off I received as an extra non-working part when I purchased the snare. The addition of a short rubber sleeve has it working flawlessly. It's visible just above the "S" and below that chrome ball like section below the knob.  DSC_2521 - Copy DSC_2521 - Copy by Larry Madsen, on Flickr |
|
|
|
Post by Larry Madsen on Mar 6, 2021 22:33:54 GMT -5
|
|
Grizbear-NJ
Wholenote
"I'll do the BEATING around here"
Posts: 217
Age: 71
|
Post by Grizbear-NJ on Mar 7, 2021 23:20:33 GMT -5
My friend; they look magnificent!
|
|
|
|
Post by Larry Madsen on Jun 7, 2021 14:54:59 GMT -5
This project compelled me to finally finish something I started back with the "Big Kit" and left off on it before it was finished. I made cases for all the cymbal stands and other accessories. The unfinished case was one for the bass drum pedal and any other misc things. I purchased a second Slingerland Super Speed bass drum pedal for the new kit so that alone was reason enough to complete this project. So this is it.  DSC_2617 DSC_2617 by Larry Madsen, on Flickr It holds the bass pedal, tom mount for bass bass drum, cymbal mount for bass drum, floor tom legs and bass drum spurs. Then another compartment on the right for anything else that might need to be packed up. It's carpet lined like the others and closes to be carried like a suitcase.  DSC_2618 DSC_2618 by Larry Madsen, on Flickr This is the one holding the hi-hat stand , throne and snare stand and a clasp for extra drum sticks... which I finished several years ago  Hi-hat case complete Hi-hat case complete by Larry Madsen, on Flickr This one has been completed for several years as well. The PIC here is before the carpet lining and black paint.  cymbal stand case cymbal stand case by Larry Madsen, on Flickr |
|
|
|
Post by Larry Madsen on Jul 9, 2021 17:42:23 GMT -5
I purchased a second throne, so I have one for each kit. The one I picked up now had some cracking and split vinyl, but was very, very nice otherwise. Extremely clean chrome. I went to eBay to find some leather to upholster it with and found some gold goat hides. They are very small so it took two hides to cover a 12" diameter drum seat. My upholster was stuck with a big project ... my tiny project was in the rear for a month and a half. I picked it up today. I like it a lot. As you might guess from the gold leather and the PIC, this one will go with the big kit in the music room.  DSC_2640 DSC_2640 by Larry Madsen, on Flickr I decided a diamond pattern in the seat might be nice ... I think it is nice. The goat skin is very soft and the cushion is a bit more firm that what Slingerland put on them. All around a very nice drum throne.  DSC_2641 DSC_2641 by Larry Madsen, on Flickr I like this one so much I might have the other seat redone similarly ... in a different color. |
|
sirWheat
Wholenote
For a better future, play Stevie Wonder for your children.
Posts: 318
|
Post by sirWheat on Jul 10, 2021 18:23:54 GMT -5
Nice work! And that throne is sweet. I have a couple old doctors stools...mind disclosing how much that set you back?
|
|
|
|
Post by Larry Madsen on Jul 10, 2021 19:57:32 GMT -5
mind disclosing how much that set you back? I'll quickly admit that the throne (all in at the end) was not cheap. The throne eBay purchase was $97.00. The two gold goat hides were $25.00 The upholstery job was $156.00. This is my regular upholstery shop ... we know each other. He did my Camaro seats. I told him I wanted it to come out nice, so that's what he did. And I did some prep work on the seat base to improve it a bit before I took it to be upholstered. |
|
Grizbear-NJ
Wholenote
"I'll do the BEATING around here"
Posts: 217
Age: 71
|
Post by Grizbear-NJ on Jul 12, 2021 12:55:06 GMT -5
Great job my friend: Guessing by eye, the seat diameter is about 15-16 inch. The design and workmanship is fantastic. Just by looking at it, I can tell you added some extra padding; always a good thing!
I always preferred the round seat style to the "motorcycle" or "tractor" style seats. (Long story) If you want to eventually ad a backrest to it, that's not a major problem.
If you do any gigging with it; you may want to protect it even further. In a previous posting on a different MT-2 thread; I recommended a "Bar Stool" seat cover, when working. I've seen drummers put tools in their back pockets, (forget about them) sit down, and tear the seat. Also: if the level of comfort of the seat is not up to your standard; I had good results utilizing "Egg Crate" foam. I custom cut the foam to fit inside the bar stool cover (previously mentioned) and put it on the drum throne; no adhesive of any kind needed. It was a great relief for my "posterior" when playing.
PS: I was checking out the hardware cases you made; again a great job. You are a heck of a lot more organized than I ever was!
|
|
|
|
Post by Larry Madsen on Sept 2, 2021 19:50:37 GMT -5
I picked up this hi-hat stand to go with the kit. It is identical to the stand on my big kit. www.ebay.com/itm/184984415489On the big kit I have 15" Zildjian A New Beat hats, I know that is pretty big. I thinking something smaller for the new kit. Wondering how small to go. The 13" seem about right to me, but what do I know. Obviously the choices are pretty much 12", 13" or 14". Anyone with guidance or input on the choice? Here is one option in 13" available now for a pretty good (opening bid) price. www.ebay.com/itm/174916440650?ssPageName=STRK%3AMEBIDX%3AIT&_trksid=p2060353.m1438.l2649 |
|
Grizbear-NJ
Wholenote
"I'll do the BEATING around here"
Posts: 217
Age: 71
|
Post by Grizbear-NJ on Sept 6, 2021 11:09:47 GMT -5
The only advice I can give you. If you are not gigging with the Hi-Hats, and you are utilizing that "magnificent" studio you built. Stick with the smaller size Hi-Hat cymbals. (you have a large pair of Hi-Hat cymbals already)
My experience: I utilize two different size (diameter) Hi-Hat pairs depending on the venue. In a "Live" or "out-door" venue I use a pair of 16" Zildjian Hi-Hats (Yes; it took me some time to find them); in situations where the drum-kit is "NOT" mic'd, they cut thru the stage noise quite well.
In situations where the the drum-kit "IS" mic'd; I use a pair of 14" Zildjian Hi-Hats. (regardless if in the studio or indoor/outdoor stage venue) I can only tell you that the microphones like them.
NOW! The unintended side effects. When you go to larger diameter Hi-Hat cymbals; they put "undue" strain on the standard Hi-Hat stand. Both the size and weight become a factor. (for a number of reasons) My solution to that problem was to utilize a Heavy Duty Hi-Hat stand at all times; it can handle any size Hi-Hat cymbals made. (I'm sure you don't want to go that route with your custom kit)
More notes on Hi-Hat cymbals: Regardless of the diameter, there is always a small (fraction) difference between the pair (by design). They are always marked "Top" & "Bottom"; again, for a technical reason (I won't boar you with the details). The factory markings eventually wear off; I solved that problem by marking the "inside" or "bottom" of the cymbals with a magic marker. (At my age, LARGE print was preferable)
Good Luck my friend!
|
|